实验报告
课程名称:数字图像处理
实验题目:均值滤波、中值滤波的计算机实现
学号:21281280
姓名:柯劲帆
班级:物联网2101班
指导老师:安高云
报告日期:2024年1月10日
---
**目录**
[TOC]
---
# 1. 均值、中值滤波程序
本实验中我使用Python实现均值、中值滤波。对于图像的读取、处理和保存,我都使用了按字节进行读写的方式,符合实验要求。
BMP格式图片的读写已经写在实验二中,在此不再赘述。
## 1.1. 均值滤波
均值滤波就是将图片中某一像素点的值用该点和其周围九宫格内的八个点的均值来替代。这样可以有效滤去高斯噪声。
如果直接进行滤波,滤波结果尺寸将会缩减为$(originalHeight - 2) \times (originalWidth - 2)$。因此,需要先将原图像填充至$(originalHeight + 2) \times (originalWidth + 2)$,再进行滤波,滤波后的尺寸才能保持$originalHeight \times originalWidth$。
这里填充的内容选择重复原图片边缘的像素点。
代码实现如下:
```python
def meanfilter(self):
self.meanfiltered_img = np.zeros_like(self.gray)
padded_img = np.zeros((abs(self.biHeight) + 2, self.biWidth + 2), dtype=np.int16)
padded_img[1:-1, 1:-1] = self.gray
padded_img[0, 1:-1] = self.gray[0, :]
padded_img[-1, 1:-1] = self.gray[-1, :]
padded_img[1:-1, 0] = self.gray[:, 0]
padded_img[1:-1, -1] = self.gray[:, -1]
padded_img[0][0] = self.gray[0][0]
padded_img[0][-1] = self.gray[0][-1]
padded_img[-1][0] = self.gray[-1][0]
padded_img[-1][-1] = self.gray[-1][-1]
for x in range(abs(self.biHeight)):
for y in range(self.biWidth):
self.meanfiltered_img[x][y] = np.around(np.mean(padded_img[x:x+3, y:y+3]))
return self.meanfiltered_img
```
## 1.2. 中值滤波
中值滤波就是将图片中某一像素点的值用该点和其周围九宫格内的八个点的中值来替代。这样可以有效滤去椒盐噪声。
填充的方法与均值滤波相同。
代码实现如下:
```python
def medianfilter(self):
self.medianfiltered_img = np.zeros_like(self.gray)
padded_img = np.zeros((abs(self.biHeight) + 2, self.biWidth + 2), dtype=np.int16)
padded_img[1:-1, 1:-1] = self.gray
padded_img[0, 1:-1] = self.gray[0, :]
padded_img[-1, 1:-1] = self.gray[-1, :]
padded_img[1:-1, 0] = self.gray[:, 0]
padded_img[1:-1, -1] = self.gray[:, -1]
padded_img[0][0] = self.gray[0][0]
padded_img[0][-1] = self.gray[0][-1]
padded_img[-1][0] = self.gray[-1][0]
padded_img[-1][-1] = self.gray[-1][-1]
for x in range(abs(self.biHeight)):
for y in range(self.biWidth):
self.medianfiltered_img[x][y] = np.around(np.median(padded_img[x:x+3, y:y+3]))
return self.medianfiltered_img
```
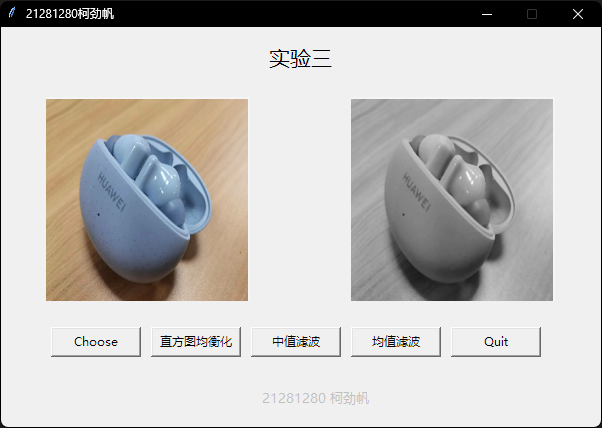
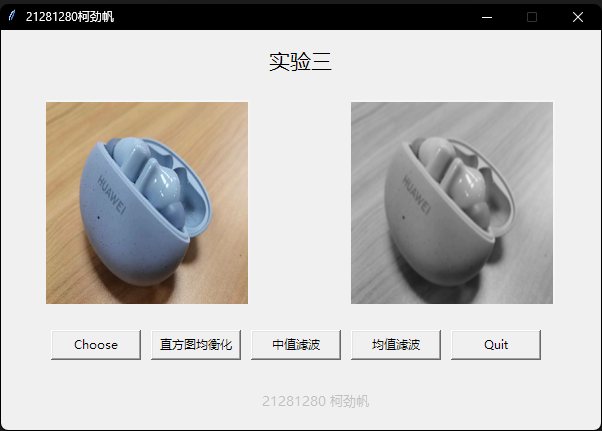
## 1.3. GUI界面设计和程序逻辑
由于相比实验二多了两个功能,UI界面和控件函数需要新增和修改。
新增和修改的代码如下:
```python
def medianfilter():
if path_ == '':
return
image = BmpData(path_)
medianfiltered_img = image.medianfilter()
medianfiltered_img = Image.fromarray(medianfiltered_img.astype(np.uint8))
# medianfiltered_img.show()
name_parts = path_.split('.')
name_parts[-2] += "_medianfiltered"
new_file_name = '.'.join(name_parts)
image.save_medianfiltered_img(new_file_name)
medianfiltered_img = medianfiltered_img.resize((int(256 * 0.8), int(256 * 0.8)))
medianfiltered_img = ImageTk.PhotoImage(medianfiltered_img)
label_image2.config(image=medianfiltered_img)
label_image2.image = medianfiltered_img # 处理后的图片的显示
def meanfilter():
if path_ == '':
return
image = BmpData(path_)
meanfiltered_img = image.meanfilter()
meanfiltered_img = Image.fromarray(meanfiltered_img.astype(np.uint8))
# meanfiltered_img.show()
name_parts = path_.split('.')
name_parts[-2] += "_meanfiltered"
new_file_name = '.'.join(name_parts)
image.save_meanfiltered_img(new_file_name)
meanfiltered_img = meanfiltered_img.resize((int(256 * 0.8), int(256 * 0.8)))
meanfiltered_img = ImageTk.PhotoImage(meanfiltered_img)
label_image2.config(image=meanfiltered_img)
label_image2.image = meanfiltered_img # 处理后的图片的显示
if __name__ == "__main__":
root = tkinter.Tk()
root.title('21281280柯劲帆') # 标题
width, height = 600, 400
width_max, height_max = root.maxsize()
s_center = '%dx%d+%d+%d' % (width, height, (width_max - width) / 2, (height_max - height) / 2) # 将页面显示在正中间
root.geometry(s_center)
root.resizable(width=False, height=False) # 窗口不可移动
l = tkinter.Label(root, text='实验三', width=60, height=2, fg='black', font=("微软雅黑", 16), anchor=tkinter.CENTER)
l.pack()
label_image1 = tkinter.Label(root, width=int(256 * 0.8), height=int(256 * 0.8), bg='whitesmoke', anchor=tkinter.NE)
label_image1.pack()
label_image1.place(x=45, y=70, width=int(256 * 0.8), height=int(256 * 0.8))
label_image2 = tkinter.Label(root, width=int(256 * 0.8), height=int(256 * 0.8), bg='whitesmoke', anchor=tkinter.NE)
label_image2.place(x=350, y=70, width=int(256 * 0.8), height=int(256 * 0.8))
# 文本按钮
Image_Input = tkinter.Button(root, text='Choose', command=choosepic)
Image_Input.place(x=50, y=300, width=90, height=30)
# 直方图均衡化
Fun1 = tkinter.Button(root, text='直方图均衡化', command=equalize)
Fun1.place(x=150, y=300, width=90, height=30)
# 中值滤波
Fun1 = tkinter.Button(root, text='中值滤波', command=medianfilter) # 添加对应按钮
Fun1.place(x=250, y=300, width=90, height=30)
# 均值滤波
Fun2 = tkinter.Button(root, text='均值滤波', command=meanfilter) # 添加对应按钮
Fun2.place(x=350, y=300, width=90, height=30)
# 退出
Quit = tkinter.Button(root, text='Quit', command=sys.exit)
Quit.place(x=450, y=300, width=90, height=30)
end = tkinter.Label(root, text='21281280 柯劲帆', fg='silver', font=("微软雅黑", 10))
end.place(x=215, y=360, width=200, height=20)
root.mainloop()
```
# 2. 实验过程
编好代码后,对Python代码进行封装,变成exe可执行程序。
在命令行中配置环境并封装:
```sh
> pip install pyinstaller
> Pyinstaller -F -w read_bmp.py
```
在文件资源管理器窗口中双击exe文件,即可运行。
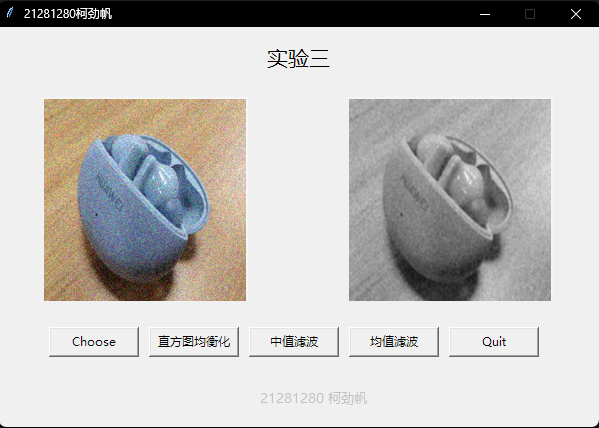
# 3. 实验结果及分析
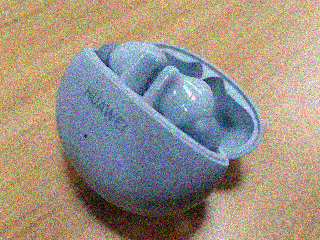
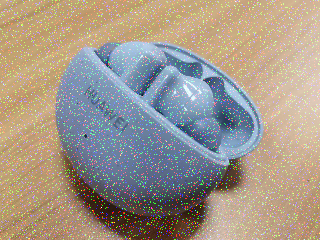
这里我准备了手机拍摄的1张图片,对其添加高斯噪声和椒盐噪声:
```python
import skimage
from PIL import Image
import numpy as np
if __name__ == '__main__':
origin = skimage.img_as_float(Image.open('./test_images/my_image_normal.bmp'))
noisy = skimage.util.random_noise(origin, mode='gaussian', var=0.01)
noisy = (noisy * 255).astype(np.uint8)
skimage.io.imsave('./test_images/my_image_gaussiannoise.bmp', noisy)
origin = skimage.img_as_float(Image.open('./test_images/my_image_normal.bmp'))
noisy = skimage.util.random_noise(origin, mode='salt')
noisy = (noisy * 255).astype(np.uint8)
skimage.io.imsave('./test_images/my_image_saltnoise.bmp', noisy)
```
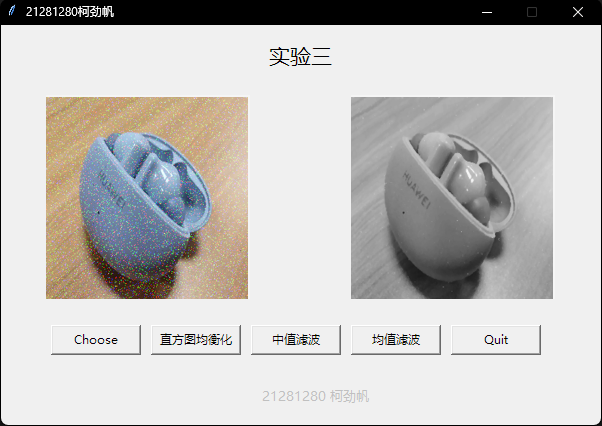
进行中值滤波、均值滤波过程和结果如下:
|
正常 |
加高斯噪声 |
加椒盐噪声 |
| 原图 |
 |
 |
 |
| 中值滤波结果 |
 |
 |
 |
| 均值滤波结果 |
 |
 |
 |
| 中值滤波过程 |
 |
 |
 |
| 均值滤波过程 |
 |
 |
 |
可见正常的图进行中值滤波后,细节有所丢失,蓝色斑点几乎消失;进行均值滤波后,蓝色斑点有所保留;
加了高斯噪声的图进行中值滤波和均值滤波的效果都并不好,还是很模糊;
加了椒盐噪声的图进行中值滤波后,噪声能明显去除;进行均值滤波,噪声去除效果不佳。
# 4. 心得体会
通过本次实验,我掌握了图像的均值滤波和中值滤波的原理及实现方法。
均值滤波可以有效滤除图像中的高斯噪声,它通过用像素点周围区域的平均值来替代该像素点的值,由于高斯噪声具有零均值的特点,所以能够有效地减弱噪声;中值滤波可以有效去除图像中的椒盐噪声,它通过用像素点周围区域的中值来替代该像素点的值,由于椒盐噪声往往处于区域灰度值的两端,使用中值可以将其排除在外。
通过测试不同的图像,我观察到均值滤波对正常图像会造成一定的模糊,而中值滤波可以很好地保持边缘细节。所以在不需要强烈平滑图像的情况下,中值滤波更好。当图像包含不同类型的噪声时,需要权衡使用均值滤波还是中值滤波。
通过本次实验,我对数字图像处理滤波方法有了更深入的理解。
# 5. 源代码
```python
import numpy as np
from struct import unpack
from PIL import Image, ImageTk
import sys
import tkinter
import tkinter.filedialog
class BmpData:
def __init__(self, file_path:str):
with open(file_path, "rb") as file:
self.file = file
self.bfType = unpack(" np.ndarray:
if (self.bfOffBits == 0x36): # 16/24位图像不需要调色板,起始位置就等于0x36
return None
color_alette_size = 2 ** int(self.biBitCount) # 多少字节调色板颜色就有2^n个
color_palette = np.zeros((color_alette_size, 3), dtype=np.int32)
self.file.seek(0x36)
for i in range(color_alette_size):
b = unpack("B", self.file.read(1))[0]
g = unpack("B", self.file.read(1))[0]
r = unpack("B", self.file.read(1))[0]
alpha = unpack("B", self.file.read(1))[0]
color_palette[i][0] = b
color_palette[i][1] = g
color_palette[i][2] = r
return color_palette
def get_numpy_img(self) -> np.ndarray:
biHeight = abs(self.biHeight)
img_np = np.zeros((biHeight, self.biWidth, 3), dtype=np.int32)
self.file.seek(self.bfOffBits)
for x in range(biHeight):
row_byte_count = ((self.biWidth * self.biBitCount + 31) >> 5) << 2
row_bits = self.file.read(row_byte_count)
row_bits = ''.join(format(byte, '08b') for byte in row_bits)
for y in range(self.biWidth):
pixel_data = row_bits[y * self.biBitCount: (y + 1) * self.biBitCount]
if self.biHeight > 0: # 图像倒立
img_np[biHeight - 1 - x][y] = self.get_RGB(pixel_data)
else:
img_np[x][y] = self.get_RGB(pixel_data)
return img_np
def get_gray_img(self) -> np.ndarray:
biHeight = abs(self.biHeight)
gray_img = np.dot(self.img_np.reshape((biHeight * self.biWidth, 3)).astype(np.float32),
[0.299, 0.587, 0.114]).astype(np.int32)
gray_img = gray_img.reshape((biHeight, self.biWidth))
return gray_img
def get_RGB(self, pixel_data:str):
if len(pixel_data) <= 8:
color_index = int(pixel_data, 2)
return self.color_palette[color_index]
elif len(pixel_data) == 16:
b = int(pixel_data[1:6], 2) * 8
g = int(pixel_data[6:11], 2) * 8
r = int(pixel_data[11:16], 2) * 8
return [r, g, b]
elif len(pixel_data) == 24:
b = int(pixel_data[0:8], 2)
g = int(pixel_data[8:16], 2)
r = int(pixel_data[16:24], 2)
return [r, g, b]
elif len(pixel_data) == 32:
b = int(pixel_data[0:8], 2)
g = int(pixel_data[8:16], 2)
r = int(pixel_data[16:24], 2)
alpha = int(pixel_data[24:32], 2)
return [r, g, b]
def equalize(self, level:int):
biHeight = abs(self.biHeight)
self.hist = np.zeros(256, dtype=np.int32)
max_value = self.gray.max()
min_value = self.gray.min()
gap = (max_value - min_value + 1) / level
for x in range(biHeight):
for y in range(self.biWidth):
self.hist[self.gray[x, y]] += 1
hist = np.zeros(level, dtype=np.float32)
for i in range(level):
hist[i] = np.sum(self.hist[min_value + int(i * gap) : min_value + int((i + 1) * gap)])
hist /= biHeight * self.biWidth
for i in range(1, level):
hist[i] += hist[i - 1]
hist *= level
hist = np.around(hist)
hist /= level
hist = np.floor(hist * 255).astype(np.int32)
self.equalized_img = np.zeros_like(self.gray)
self.equalized_hist = np.zeros(256, dtype=np.int32)
for x in range(biHeight):
for y in range(self.biWidth):
self.equalized_img[x, y] = hist[int((self.gray[x, y] - min_value) / gap)]
self.equalized_hist[self.equalized_img[x, y]] += 1
return self.equalized_img, self.hist, self.equalized_hist
def save_equalized_img(self, save_path:str):
self.save_img(image=self.equalized_img, save_path=save_path)
def medianfilter(self):
self.medianfiltered_img = np.zeros_like(self.gray)
padded_img = np.zeros((abs(self.biHeight) + 2, self.biWidth + 2), dtype=np.int16)
padded_img[1:-1, 1:-1] = self.gray
padded_img[0, 1:-1] = self.gray[0, :]
padded_img[-1, 1:-1] = self.gray[-1, :]
padded_img[1:-1, 0] = self.gray[:, 0]
padded_img[1:-1, -1] = self.gray[:, -1]
padded_img[0][0] = self.gray[0][0]
padded_img[0][-1] = self.gray[0][-1]
padded_img[-1][0] = self.gray[-1][0]
padded_img[-1][-1] = self.gray[-1][-1]
for x in range(abs(self.biHeight)):
for y in range(self.biWidth):
self.medianfiltered_img[x][y] = np.around(np.median(padded_img[x:x+3, y:y+3]))
return self.medianfiltered_img
def save_medianfiltered_img(self, save_path:str):
self.save_img(image=self.medianfiltered_img, save_path=save_path)
def meanfilter(self):
self.meanfiltered_img = np.zeros_like(self.gray)
padded_img = np.zeros((abs(self.biHeight) + 2, self.biWidth + 2), dtype=np.int16)
padded_img[1:-1, 1:-1] = self.gray
padded_img[0, 1:-1] = self.gray[0, :]
padded_img[-1, 1:-1] = self.gray[-1, :]
padded_img[1:-1, 0] = self.gray[:, 0]
padded_img[1:-1, -1] = self.gray[:, -1]
padded_img[0][0] = self.gray[0][0]
padded_img[0][-1] = self.gray[0][-1]
padded_img[-1][0] = self.gray[-1][0]
padded_img[-1][-1] = self.gray[-1][-1]
for x in range(abs(self.biHeight)):
for y in range(self.biWidth):
self.meanfiltered_img[x][y] = np.around(np.mean(padded_img[x:x+3, y:y+3]))
return self.meanfiltered_img
def save_meanfiltered_img(self, save_path:str):
self.save_img(image=self.meanfiltered_img, save_path=save_path)
def save_img(self, image:np.ndarray, save_path:str):
with open(save_path, "wb") as file:
file.write(int(self.bfType).to_bytes(2, byteorder='little')) # 0x00 文件类型
file.write(int(0x36 + 0x100 * 4 + self.biWidth * abs(self.biHeight)).to_bytes(4, byteorder='little')) # 0x02 文件大小
file.write(int(0).to_bytes(4, byteorder='little')) # 0x06 保留,必须设置为0
file.write(int(0x36 + 0x100 * 4).to_bytes(4, byteorder='little')) # 0x0a 从头到位图数据的偏移
file.write(int(40).to_bytes(4, byteorder='little')) # 0x0e 信息头的大小
file.write(int(self.biWidth).to_bytes(4, byteorder='little')) # 0x12 图像的宽度
file.write(int(self.biHeight).to_bytes(4, byteorder='little')) # 0x16 图像的高度
file.write(int(self.biPlanes).to_bytes(2, byteorder='little')) # 0x1a 颜色平面数
file.write(int(8).to_bytes(2, byteorder='little')) # 0x1c 比特数/像素数
file.write(int(self.biCompression).to_bytes(4, byteorder='little')) # 0x1e 压缩类型
file.write(int(self.biSizeImage).to_bytes(4, byteorder='little')) # 0x22 位图数据的大小
file.write(int(self.biXPelsPerMeter).to_bytes(4, byteorder='little')) # 0x26 水平分辨率
file.write(int(self.biYPelsPerMeter).to_bytes(4, byteorder='little')) # 0x2a 垂直分辨率
file.write(int(0x100 * 4).to_bytes(4, byteorder='little')) # 0x2e 位图使用的调色板中的颜色索引数
file.write(int(0).to_bytes(4, byteorder='little')) # 0x32 对图像显示有重要影响的颜色索引数
for i in range(256):
file.write(int(i).to_bytes(1, byteorder='little'))
file.write(int(i).to_bytes(1, byteorder='little'))
file.write(int(i).to_bytes(1, byteorder='little'))
file.write(int(0).to_bytes(1, byteorder='little'))
for x in range(abs(self.biHeight)):
for y in range(self.biWidth):
if self.biHeight > 0:
file.write(int(image[self.biHeight - 1 - x][y]).to_bytes(1, byteorder='little'))
else:
file.write(int(image[x][y]).to_bytes(1, byteorder='little'))
file.write(b'0' * ((((self.biWidth * 8 + 31) >> 5) << 2) - 8 * self.biWidth))
file.close()
def choosepic():
global path_
path_ = tkinter.filedialog.askopenfilename(title='请选择图片文件', filetypes=[('图片', '.bmp')])
if path_ == '':
return
img_temp = Image.open(path_).resize((int(256 * 0.8), int(256 * 0.8))) # 图片读取和加载
img = ImageTk.PhotoImage(img_temp)
label_image1.config(image=img)
label_image1.image = img
def equalize():
if path_ == '':
return
image = BmpData(path_)
# img = Image.fromarray(image.img_np.astype(np.uint8))
# img.show()
equalized_img, hist, equalized_hist = image.equalize(8) # 分别为均衡化的图/直方图/均衡化后的直方图
equalized_img = Image.fromarray(equalized_img.astype(np.uint8))
# equalized_img.show()
name_parts = path_.split('.')
name_parts[-2] += "_equalized"
new_file_name = '.'.join(name_parts)
image.save_equalized_img(new_file_name)
equalized_img = equalized_img.resize((int(256 * 0.8), int(256 * 0.8)))
equalized_img = ImageTk.PhotoImage(equalized_img)
label_image2.config(image=equalized_img)
label_image2.image = equalized_img # 处理后的图片的显示
def medianfilter():
if path_ == '':
return
image = BmpData(path_)
medianfiltered_img = image.medianfilter()
medianfiltered_img = Image.fromarray(medianfiltered_img.astype(np.uint8))
# medianfiltered_img.show()
name_parts = path_.split('.')
name_parts[-2] += "_medianfiltered"
new_file_name = '.'.join(name_parts)
image.save_medianfiltered_img(new_file_name)
medianfiltered_img = medianfiltered_img.resize((int(256 * 0.8), int(256 * 0.8)))
medianfiltered_img = ImageTk.PhotoImage(medianfiltered_img)
label_image2.config(image=medianfiltered_img)
label_image2.image = medianfiltered_img # 处理后的图片的显示
def meanfilter():
if path_ == '':
return
image = BmpData(path_)
meanfiltered_img = image.meanfilter()
meanfiltered_img = Image.fromarray(meanfiltered_img.astype(np.uint8))
# meanfiltered_img.show()
name_parts = path_.split('.')
name_parts[-2] += "_meanfiltered"
new_file_name = '.'.join(name_parts)
image.save_meanfiltered_img(new_file_name)
meanfiltered_img = meanfiltered_img.resize((int(256 * 0.8), int(256 * 0.8)))
meanfiltered_img = ImageTk.PhotoImage(meanfiltered_img)
label_image2.config(image=meanfiltered_img)
label_image2.image = meanfiltered_img # 处理后的图片的显示
if __name__ == "__main__":
root = tkinter.Tk()
root.title('21281280柯劲帆') # 标题
width, height = 600, 400
width_max, height_max = root.maxsize()
s_center = '%dx%d+%d+%d' % (width, height, (width_max - width) / 2, (height_max - height) / 2) # 将页面显示在正中间
root.geometry(s_center)
root.resizable(width=False, height=False) # 窗口不可移动
l = tkinter.Label(root, text='实验三', width=60, height=2, fg='black', font=("微软雅黑", 16), anchor=tkinter.CENTER)
l.pack()
label_image1 = tkinter.Label(root, width=int(256 * 0.8), height=int(256 * 0.8), bg='whitesmoke', anchor=tkinter.NE)
label_image1.pack()
label_image1.place(x=45, y=70, width=int(256 * 0.8), height=int(256 * 0.8))
label_image2 = tkinter.Label(root, width=int(256 * 0.8), height=int(256 * 0.8), bg='whitesmoke', anchor=tkinter.NE)
label_image2.place(x=350, y=70, width=int(256 * 0.8), height=int(256 * 0.8))
# 文本按钮
Image_Input = tkinter.Button(root, text='Choose', command=choosepic)
Image_Input.place(x=50, y=300, width=90, height=30)
# 直方图均衡化
Fun1 = tkinter.Button(root, text='直方图均衡化', command=equalize)
Fun1.place(x=150, y=300, width=90, height=30)
# 中值滤波
Fun1 = tkinter.Button(root, text='中值滤波', command=medianfilter) # 添加对应按钮
Fun1.place(x=250, y=300, width=90, height=30)
# 均值滤波
Fun2 = tkinter.Button(root, text='均值滤波', command=meanfilter) # 添加对应按钮
Fun2.place(x=350, y=300, width=90, height=30)
# 退出
Quit = tkinter.Button(root, text='Quit', command=sys.exit)
Quit.place(x=450, y=300, width=90, height=30)
end = tkinter.Label(root, text='21281280 柯劲帆', fg='silver', font=("微软雅黑", 10))
end.place(x=215, y=360, width=200, height=20)
root.mainloop()
```